Power Tools GUI Tutorial Step 3
Step 3: Healing the Geometry
The first step to improving any geometry is to look for badly defined geometry
and to fix it using the Autoheal tool in CUBIT. The Geometry Analysis
tool may detect these inconsistencies, but only if such a function exists
in the parent software. It is always a good idea to run the Autoheal on
imported geometry. In this example, the Power Tools has located some badly
defined curves. This step will show you how to use the geometry repair
tool to fix these curves.
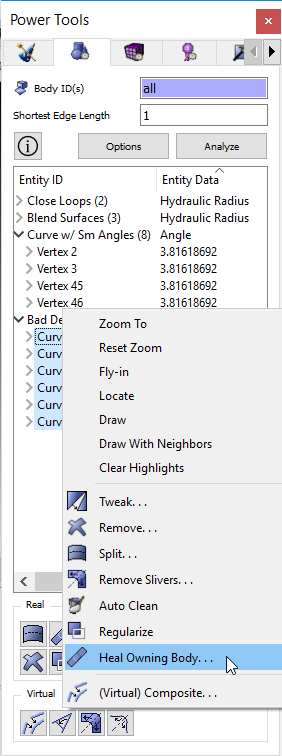
- Highlight all of the
badly defined curves by holding down the Shift key while selecting
- Right click and select Heal Owning Body from the
list of options
OR
- Click the
 button
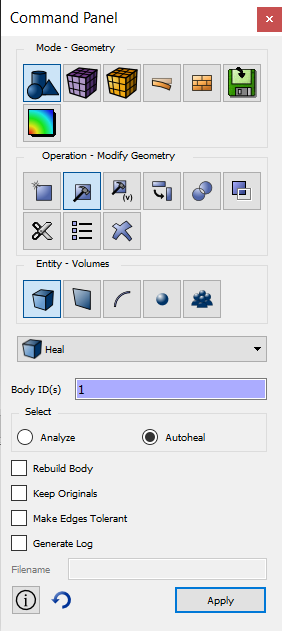
The Geometry Repair Tool does not execute any geometry clean-up commands
directly, but directs you to the place on the Control Panel where this
function can be executed. The following menu will appear on the Control
Panel. Notice that the id of the owning body has already been pasted into
the input window.
- Select the Autoheal button
- Press Apply
The output window on the CUBIT GUI should appear with the following
message. You may have to scroll to see the whole thing. The percentage
before and after healing are 97% to 100%. Healing has been successful.
Run the geometry analysis test again to guarantee that all bad geometry
has been removed.
- Press the Analyze Button in the Geometry Repair
window